Managing contacts on the iPad can be a little tricky to learn, but once you are set up and understand a few of the basics, it is seamless and a far better experience than you may be used to.
In this
post, we are going to review a few of the basic steps and also address
getting contact information into your contacts using the electronic vCards. Once this process is mastered, business cards
will seem outdated (although everyone still uses them...).
Setting up Email; Designating Contacts Accounts
Multiple
email accounts are simple to setup, and even simpler to manage!
Below are my email accounts – of
which three are my “main” accounts.
When the
accounts were setup, two accounts were indicated as “Contacts” accounts. This means that my iPad reflects the contents
of all contacts included in my main Gmail account and my work Outlook account.
When you
have more than one account with contacts, you need to designate a “default”
account. Translated, this means…
“what account do you
want me to put new contacts in?”
Once set,
the iPad will set all new contacts to sync with that account. In my case, I chose my Don Gmail (Main) account.
Setting Your Default Contacts Account
To set a default contacts list on the iPad, follow these steps:
1. Tap Settings > Mail, Contacts,
Calendars.
2. Scroll down to the section labeled Contacts.
3. Tap Default Account.
o
If Default
Account does not exist in the Contacts section, then your
device has only one contacts list.
4. Select the account you want to set as the
default contacts list for your iPad.
5. Tap Mail... at the top of the
screen to return to the Mail, Contacts, Calendars page.
Sample screen below
Sending Email
It is simple
to send email from either any of your email accounts, or when sharing from an
application on the iPad. If you send
directly from your email account(s), the “From”
address is the account you chose to start the email. If you initiate an email from another app,
the “From” address is your default
email account. However, this is easy to
change, as shown below:
Tip: Many times, depending on whether the information you send is
professional or personal, you want the email to come from the proper
account. So, for example, if you are
forwarding an article from the web to a colleague/client, you change the “From”
address to your work address.
Managing Digital Business Cards (vCards)
Although
many professionals use paper business cards, this is almost unnecessary
today. We operate in a digital world,
where contact information is received (or capable of being received) seamlessly
into our contact management process.
Although
managing this on the iPad is not necessarily intuitive, it is basic, and
implementing a few simple steps will enable you to eliminate virtually all of
your manual entering (or scanning) of business cards.
Typical
sources of digital business cards are through an email or through the web
(company website, links to digital business cards, etc.).
A few
examples follow:
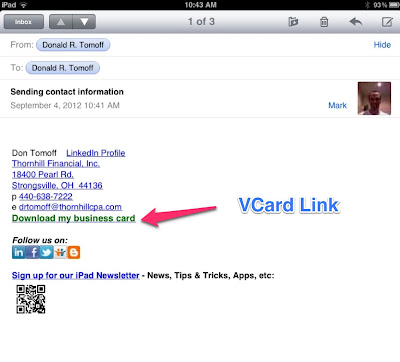
Email
Link to
business card included in email signature:
WebLinks
LinkedIn Connection
|
|
Company
website contacts page
Digital Business Card to iPad Contacts
Now that we can obtain contact
information digitally – virtually everyone provides this access – the goal is
to create a seamless process for getting the data into your contact management
system.
Import vCard Received as Email Attachment
If a vCard
is received as an attachment, it is very simple to import into contacts
1.
Tap
vCard attachment in email
2.
Tap
“Create New Contact” in open contact
information screen that appears
See the screenshot below.
Import vCard From a Web Link
This is more
of a challenge – although it is a simple two step process to execute, it does
require a third-party app (at least that I know of…). This appears to be a fundamental oversight on
Apple’s part. Although there are at
least several approaches to accomplishing this, I found the simplest method to
be through the Evernote app.
The steps
are simple:
- Open vCard in Evernote
- Open attachment in Evernote and tap “Create New Contact”
- Done
The visual
of this process is below.
- Tap vCard website link
- Tap "Open in Evernote" button
- Open vCard in Evernote and tap “Create New Contact”
- "Edit" mode once you tap "Create New Contact" (edit, if necessary, then tap Done)
- Contact in Address Book


